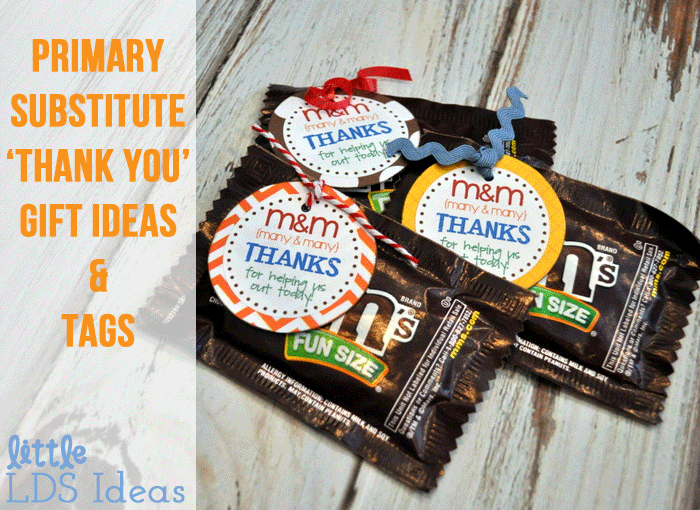
We really appreciate our teachers for all their hard work and for teaching the children important gospel truths. But what about those that offer their help when the teachers can’t be there? Here are some ideas that you can use to let them know how much you appreciate them.
Here’s what you need!
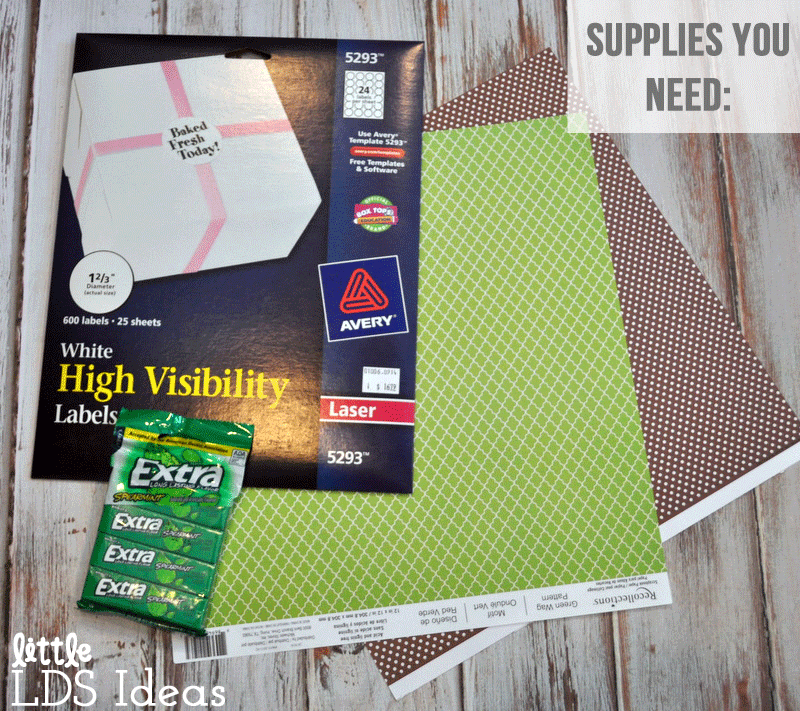
This is what I used and what you will need to create your own ‘Thank You’ treats. Some of the items you don’t HAVE to have, but it makes things easier. :)
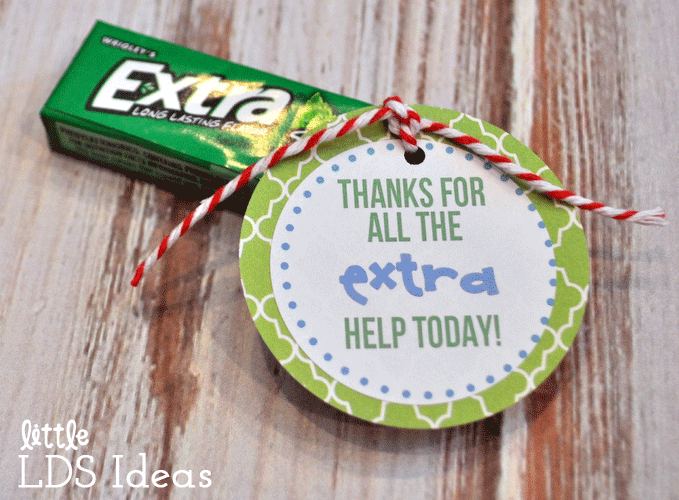
First you will need candy (yum). We had some M&M’s left-over from another activity and we decided to also buy some ‘Extra’ gum.
You will also need some cute scrapbook paper,
White Circle 1 2/3″ sticker labels or a 1 1/2″ circle punch (optional),
a 2″ circle punch (optional),
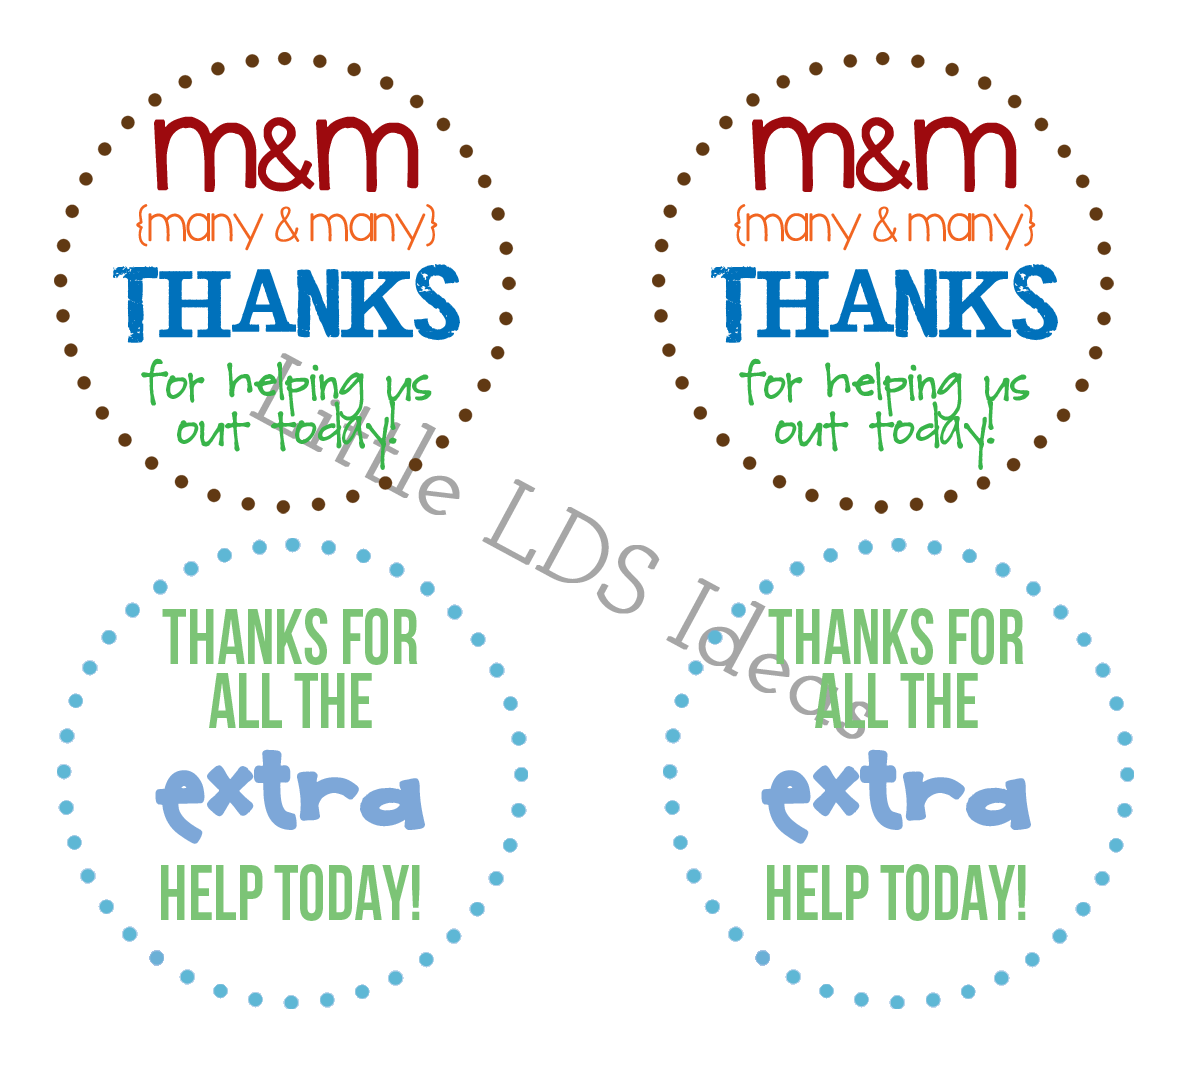
and my ‘Thank You’ circle tags (download link below).
I began by creating and printing out my ‘Thank You’ labels (pictured below). I printed mine onto the Avery sticker labels (pictured above), but you can also print them onto white paper and cut them out with scissors or use a circle punch.
Next, cut out some larger circles using the scrapbook paper. I used my 2″ circle punch and cut out circles of scrapbook paper. Then attach my ‘sticker labels’ onto each scrapbook paper circle. If you use the sticker labels no need to glue, just stick them right onto the scrapbook paper. If you cut them out with scissors or a punch, just glue them onto the scrapbook paper.
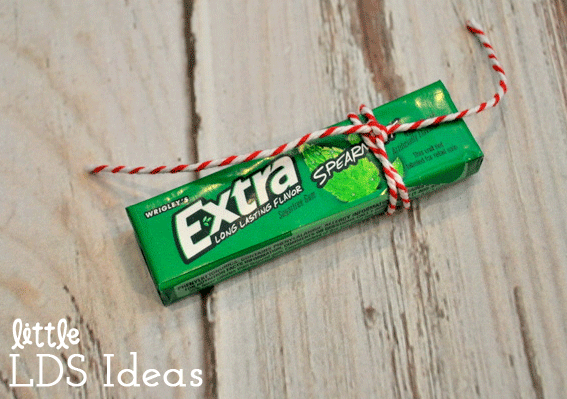
After my tags were finished, I grabbed the gum. First I wrapped my twine around the gum a couple times and tied a knot.
I punched a small hole into the top of each tag and then tied it to the package of gum using the twine.
I tied another knot once the tag was on.
And that’s it! I used twine because that’s what I had on hand, but you could use twine, ribbon, curly ribbon or anything else.
For the packages of M&M’s, I punched a hole and tied some ribbon or twine into a knot at the top of the tag. Then I just glued the tags to each package of M&M’s.
If you’re in need of some Substitute Thank You treats and would like to use my tags, then click the link below.
**I was able to print them just fine onto my Avery sticker labels, but I don’t know each individual printer, so I can’t say it will work for everyone.
Thanks so much for stopping by! Have a wonderful day!


