Tag Archive: LDS Primary

Restoration Puzzle

Restoration Jigsaw Puzzle

I made these puzzles for lesson 6 in the Primary 3 manual, “The Restoration”. Completed, it shows the church in Christ’s time, and in Our time. Apart, it shows some bits and pieces of the gospel that other churches have. (And others that were taken away completely.) I used it as I taught the lesson, and I also made one on card stock for each child to put together in…
Read more

{Cub Scouts} A Peek Into My Cub Scout Binder!
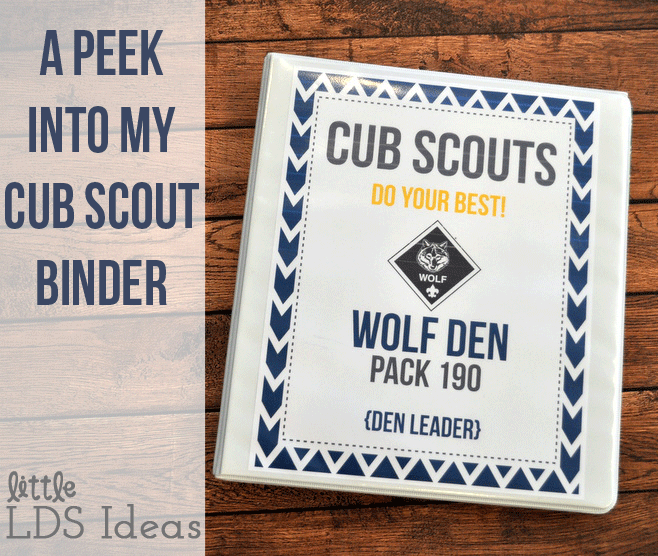
Today I am letting you have a peek into my Cub Scout Binder.

But before I dive into that I just wanted to say a few things about my calling as a Cub Scout Den Leader.


Last June my husband and I received a call from one of the Bishopric members asking if they could meet with us. I already had 2 callings, so I assumed it was for my husband. The day came that we agreed to meet…I was anxious, but like I said, I ‘knew’ this didn’t have to do with me.

As we sat in the room the Bishopric member looked at ME! Then he said, “Sheena, we would like to extend a calling to you.” Seriously!?! Then he said, “We would like to call you as a Wolf Den Leader.” I probably gave him a ‘deer in the headlights’ kind of look. I accepted the calling, but I was not excited at all.

I only have one son, so I thought I would be able to sneak by without receiving a cub scout calling. All summer long I drug my feet and dreaded this calling.
Finally, a few weeks before school started (and cub scouts) we had to drive to Utah for a family baptism. I decided to take my Cub Scout handbooks and read up on what I was supposed to be doing since I had no clue what I was supposed to do. People kept talking about all these meetings and strange words that I had never heard of…Den Meeting…Pack Meeting…Pack Planning…Segments….Belt Loops!


On our way to Utah I read and read and read and planned. All those strange words and meetings were starting to make sense.

I finally felt like I could do this and I was getting excited about my new calling! {Gasp}

It’s been about 6 months since we began Cub Scouts and I have really enjoyed it. I am enjoying being able to help my son with cub scouts and be a part of it. I am enjoying making this cub scout experience fun for the boys and help them get excited about scouts.

There are always going to be ‘those callings’ that we dread and would rather never be asked to do. But I have found as I immerse myself into serving and doing all I can to magnify my calling those callings that are less desirable quickly become some of my most favorite callings.

Have you been called as a Cub Scout Leader and feel the way I did?
Give it a chance. But one thing that will make your calling more enjoyable is to be organized! Don’t wait until the night before your Den Meeting to decide what to do. That will just stress you out and make you dislike your calling even more.

Enough with my chatter…Today I hope someone can find my binder helpful in their calling. Here is my cub scout binder and some other helpful tips.

Here’s my binder. Inside is where I keep track of Attendance, Records, Den Meetings, Pack Meetings, and more.
I am extremely grateful for the folks over at Akela’s Council for all their wonderful ideas and tracking sheets. They are amazing and very useful. If you’ve never been to their site then you definitely need to head on over there.


When I first open my binder I have a Cub Scout Overview from the Cub Scout Den & Pack Meeting Resource Guide that the previous leader gave to me.

This is a great resource as it goes over your responsibilities as a leader, Purposes of Cub Scouts, Methods, Awards, and more.


First Section: Attendance
I have several dividers in my Binder for each section. My first divider/section is for Attendance.
This is where I have my attendance sheets for each Cub Scout. I am not sure where to find these exact sheets because these were given to me. I have looked online, but have not been able to find any like this.

But there is an attendance section on the sheets that I use for my record keeping. :)
Every week we take roll. Sometimes I have our denner stand at the front and as I call each boy’s name I have them come to the front and do the Cub Scout handshake with the denner. Other times I have had them make the cub scout sign when I call their name, or say the motto.
This helps them to learn each of these things.
Other times I have them say something {during Halloween I had them make a spooky Halloween noice}.


Second Section: Scout Records


This is where the fabulous Akela’s Council is a big help.
These sheets are amazing! There is a space to keep track of the Achievements that are completed, a place for Electives, Place to keep track of beads that have been earned, Attendance, Notes & Misc. awards that have been earned, Denner section, and Gold/Silver Points that have been earned.

This sheet has it all and I absolutely love it! They even have sheets for the new program coming out this year.

Third Section: Belt Loops & Segments
I have a Segment Pamphlet from our Council that I keep in this section. I look through it often to see what Segments the boys may have passed off during our Den Meetings.

I also use Akela’s Council ‘Acedemic Belt Loop and Pin Record Sheet’ for this section.
It’s nice to have a list of all the Belt Loops available on one sheet. Then I just go online to see the requirements.


Fourth Section: Den Meetings
This Section is where I keep my ‘Wolf Den Meeting Plans’ from the Cub Scout Den & Pack Meeting Resource Guide


I also try to keep our schedule in this section as well as a Meeting Tracker Sheet (below).

Here is my Wolf Den Meeting Tracker Sheet
I created this to help me keep track what we did during each Den Meeting. I also keep track of anything we did that can be counted toward a segment or belt loop. Click Below to print out a blank Tracker Sheet.
 Fifth Section: Pack Meetings
This section is for all things to do with Monthly Pack Meeting. 

I attend my monthly Pack Planning Meetings. This section is where I keep all my notes from the meeting.

I also keep my ‘Pack Meeting Plans’ section from the Cub Scout Den & Pack Meeting Resource Guide in this section of my Binder.

In the back pocket of my Binder I keep extra Boy Scout Application Forms for any new Cub Scouts that come in. I also have a ‘Welcome to Cub Scouts’ letter that I sometimes keep in there (that will have to wait for another post).
I hope you have found my ‘peek’ into my Cub Scout binder helpful. These wonderful resources that I use help keep me organized (and sane). Are you a Cub Scout Leader? What do you have in your Binder…I would love to hear.
Thanks so much for stopping by. If you like my Binder Cover and would like one of your own just let me know, so I can add the file to my post.
Have a wonderful day!

{Primary} Substitute ‘Thank You’ Treats
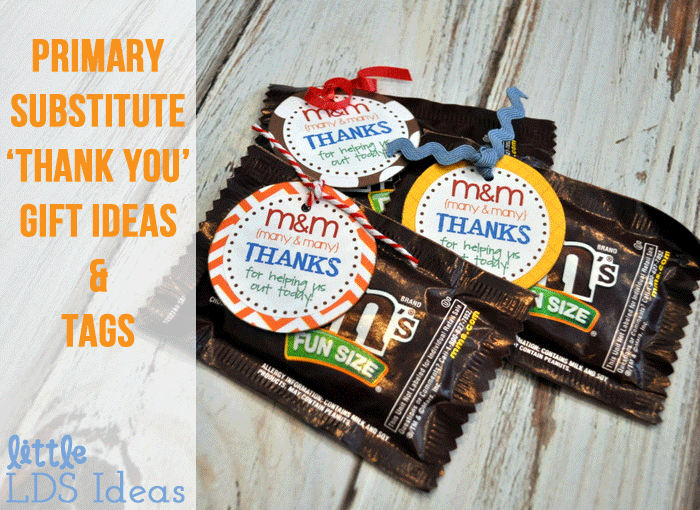
A few weeks ago I shared our Teacher Birthday Gifts. Today I am sharing our Substitute ‘Thank You’ treats.


We really appreciate our teachers for all their hard work and for teaching the children important gospel truths. But what about those that offer their help when the teachers can’t be there? Here are some ideas that you can use to let them know how much you appreciate them.

Here’s what you need!


This is what I used and what you will need to create your own ‘Thank You’ treats. Some of the items you don’t HAVE to have, but it makes things easier. :)

First you will need candy (yum). We had some M&M’s left-over from another activity and we decided to also buy some ‘Extra’ gum.
You will also need some cute scrapbook paper,
White Circle 1 2/3″ sticker labels or a 1 1/2″ circle punch (optional),
a 2″ circle punch (optional),
and my ‘Thank You’ circle tags (download link below).


I began by creating and printing out my ‘Thank You’ labels (pictured below). I printed mine onto the Avery sticker labels (pictured above), but you can also print them onto white paper and cut them out with scissors or use a circle punch.


Next, cut out some larger circles using the scrapbook paper. I used my 2″ circle punch and cut out circles of scrapbook paper. Then attach my ‘sticker labels’ onto each scrapbook paper circle. If you use the sticker labels no need to glue, just stick them right onto the scrapbook paper. If you cut them out with scissors or a punch, just glue them onto the scrapbook paper.

After my tags were finished, I grabbed the gum. First I wrapped my twine around the gum a couple times and tied a knot.


I punched a small hole into the top of each tag and then tied it to the package of gum using the twine.

I tied another knot once the tag was on.
And that’s it! I used twine because that’s what I had on hand, but you could use twine, ribbon, curly ribbon or anything else.

For the packages of M&M’s, I punched a hole and tied some ribbon or twine into a knot at the top of the tag. Then I just glued the tags to each package of M&M’s.

If you’re in need of some Substitute Thank You treats and would like to use my tags, then click the link below.


**I was able to print them just fine onto my Avery sticker labels, but I don’t know each individual printer, so I can’t say it will work for everyone. 

Thanks so much for stopping by! Have a wonderful day!

{Printables} "You’re Just ‘Write’ Valentine!"

Are you ready for Valentine’s Day?
I have been busy getting my children’s Valentines all ready for school. We don’t have school on Friday, so my kiddos have their parties tomorrow!

I had to have them done today, so I sat down and got to work. I have to say I think they turned out great!


A few weeks ago I was shopping at Michael’s and came across a pack of 24 Valentine’s Day pencils. I thought they were great, so I bought two packs and figured we would come up with something for my children’s valentines.

I had seen so many pencil ideas in the past, but hadn’t had a whole lot of time to sit down and actually get to work. Yesterday I started searching Pinterest and saw tons of pencil ideas. There were lots of phrases that included ‘write’ and ‘sharp’, and then I saw some cute Pencil valentines with word finds and mazes. I loved the idea so that is what I decided on.

Lately my children have been in love with tic-tac-toe and word finds. My son’s weekly spelling word practice usually includes us creating a word find for him.

At first I was only going to print one puzzle for each child (half tic-tac-toe and half word finds). But then my darling children said ‘But what if my friends want both puzzles.’
We decided to print the tic-tac-toe game on the front and then printed the word find on the back.

Unfortunately my printer sometimes has issues with feeding the paper in correctly, but for the most part they turned out great and lined up correctly (I dont’ think many 1st or 3rd graders will notice).

We printed them all out…cut them…wrote names…and then attached each pencil with some cute washi tape that I had.

You could also punch a hole and tie the pencil with some twine or ribbon. 

Now for some exciting News!!

My Valentines will be available for purchase in my Etsy shop…but for 1 hour I am having a ‘Freebie Flash Sale’! 
That’s right! You have until 10:15 pm {MST} to click the links below and download my Valentines for free. After that you can find them in my Etsy shop.

So Hurry! Tell your friends and family to head on over before they’re gone!


Thanks for stopping by!
Happy Valentine’s Day!

{Sharing Time} Jesus Christ Was Resurrected, and I Will Be Too!

Sharing Time Ideas from the 2015 Primary Outline

Encourage understanding:Divide the children into groups and give each group a picture of an event related to the Resurrection (for example, you could use pictures of the Crucifixion, Christ’s burial, the empty tomb, Mary and the resurrected Lord, and Jesus showing His wounds to His disciples). Tell them not to let the other groups see their picture. Have each group give a few clues to help the other children guess what is happening in their picture. When they guess correctly, show the picture to the other groups. Explain that because Jesus Christ was resurrected, we will all be resurrected.

Sharing Time Ideas from Little LDS Ideas

For this Sharing Time I am getting a little help from a previous idea I have shared on the blog. I changed a few things up so that it would go with this week’s topic and the idea given in the outline. Enjoy!

For this Sharing Time you will be dressing up like a detective to ‘find out more’ about the Resurrection.  To look like an inspector or detective, wear a trench coat and carry a large magnifying glass.
Tell the children that you are looking for clues about the reality of the Resurrection/to learn more about the Resurrection.

You will hide different ‘clues’ around the Primary room. Each set of clues will represent one of the pictures listed in the Primary Outline.

To Prepare:

Before Primary find the pictures you will be using for this Sharing Time. Here are a few ideas to choose from:

Crucifixion

Christ’s Burial

The Empty Tomb

Mary and the Resurrected Lord

Jesus Showing His Wounds to His Disciples

You will also need to come up with a few clues for each picture. Write/type the clues onto a piece of paper. Place the clues inside of an envelope or small box. If you would like the children to find the pictures in a particular order you can label each box/envelope with a number (#1-4; or however many pictures you choose).

For Sharing Time

Have your clues hidden around the Primary room. At the front of the room have the pictures you have chosen posted on a bulletin board or chalkboard.

Invite a child to come to the front to help you find the first clue. You can hand them a magnifying glass and a hat if you’d like.

Once they find clue #1 have them open it up. Have them read the clues/statements aloud. Then have the child pick which picture they think the clues are describing.

Once the picture has been guess correctly, show the picture to the other children. Discuss what is happening in the picture.

Continue by inviting another child up to the front to help you find the next set of clues.

Conclude that the evidence is overwhelming that Jesus Christ was resurrected and that we will be too!

I really liked the ‘detective’ idea for this Sharing Time. It’s fun enough to catch/keep the children’s attention, but will be spiritual as well as you discuss each picture.

Another Idea

Here’s Another really cute idea that talks about Resurrection, that I found on lds.org {From The Friend; Sharing Time: He Lives!; April 2007}
Display three shoe boxes, and ask the children to raise their hands if they like to try on new shoes. Explain that you want them to imagine trying on some other people’s shoes, but more important you want them to imagine what it would be like to actually be that person.

One by one, take out a pair of shoes from each box. (You can also display pictures or drawings of shoes.)

Show a pair of boots to represent the soldiers who guarded Jesus’s tomb. Use detail to tell the story in such a way that the children can imagine being there when Jesus Christ was laid in the tomb.

Next, use a pair of sandals to tell the story of Mary Magdalene. Ask the children how it might have felt to have been at the garden tomb when the resurrected Savior appeared.

Last, show a pair of shoes that children in your area commonly wear. Ask how it feels to be a member of the Church and to have the knowledge that you will be resurrected because of the Atonement and Resurrection of Jesus Christ. Bear testimony that Jesus Christ is the Son of God and that He died and was resurrected.


 I hope you enjoy the ideas I have shared today. 
Thanks so much for stopping by. Have a wonderful day & a great Sharing Time!

He Sent His Son…FREEBIES!

New Born Babe (Baby Jesus)CLICK HERE TO DOWNLOAD  PathwayCLICK HERE TO DOWNLOAD Whisper or Tell(my daughter says this looks like she is signing the word “mother” in ASL.  But it’s really supposed to be whispering or telling.  Her hand i…

THIS WEBSITE WILL CEASE OPERATIONS ON DEC 31, 2018.
We are moving to http://NoBoringLessons.com/ where you can find Come Follow Me Lesson ideas for the new 2019 curriculum Dismiss